Appearance
Getting Started
Information to help you setup the module project
Requirements
Visual Studio 2022
VEN SDK
Creating New Project
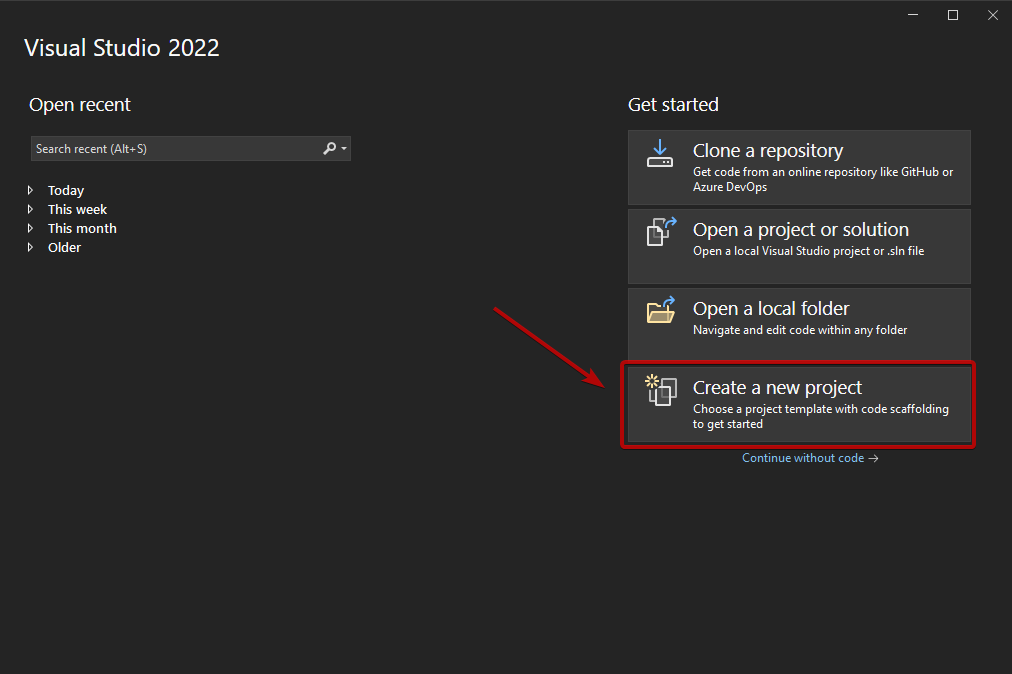
- Start Visual Studio 2022 and press "Create a new project"
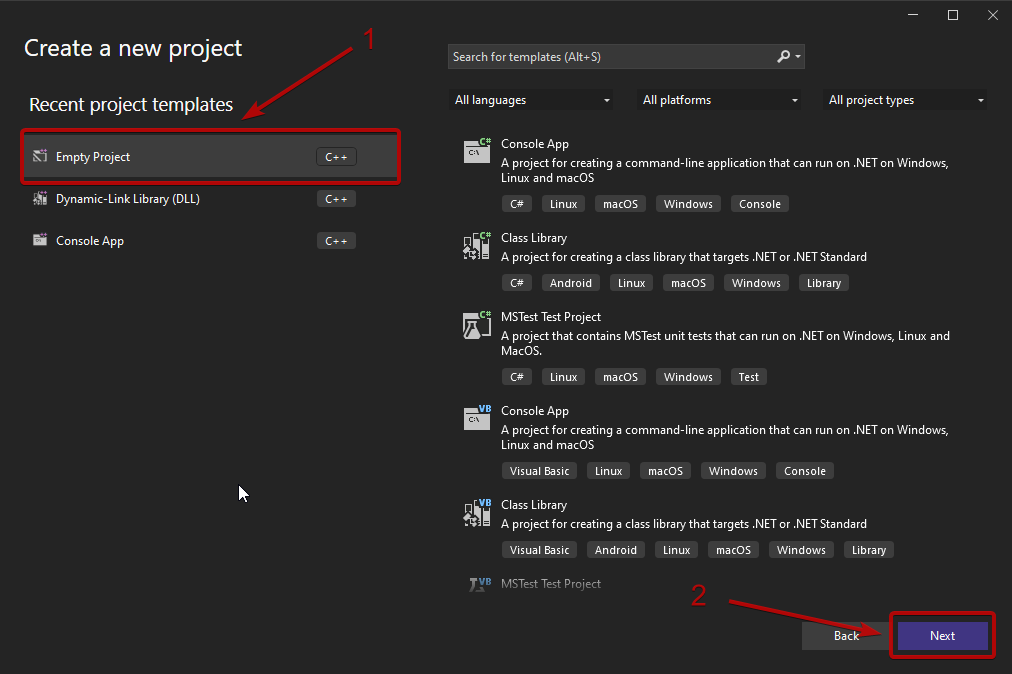
- Select "C++ Empty Project" and press "Next"
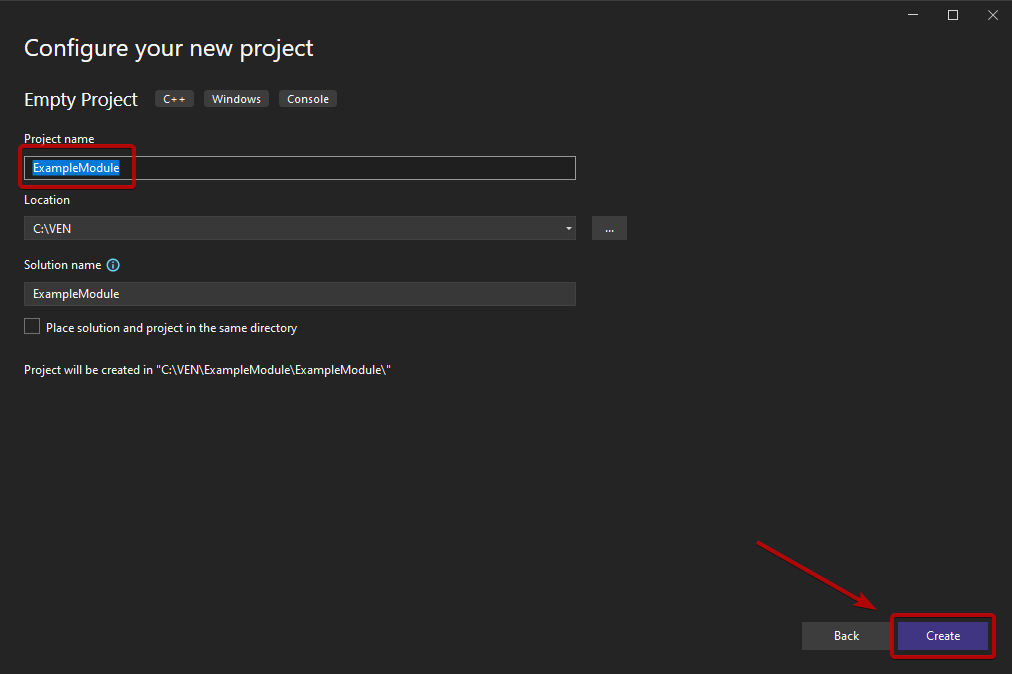
- Change the name and location of the project and press "Create"
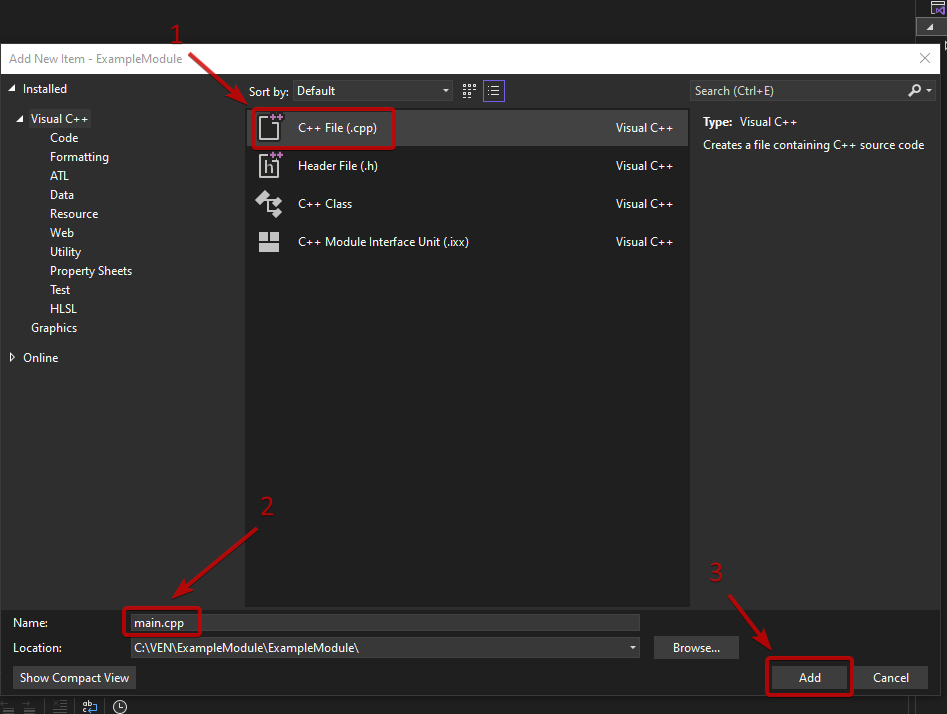
- Right click on the created project and press "Add -> New Item"
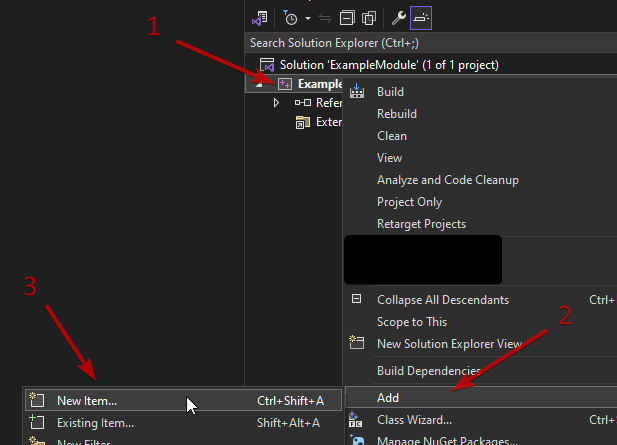
- Enter the desired name of the file that will contain the entry point of the module (f.e. "main.cpp")
Configuring the Project
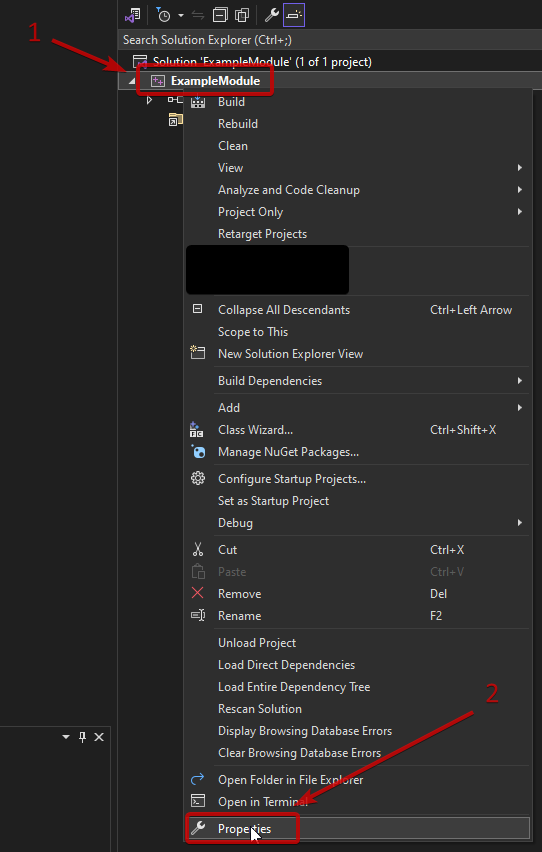
- Right click on the project name and press "Properties"
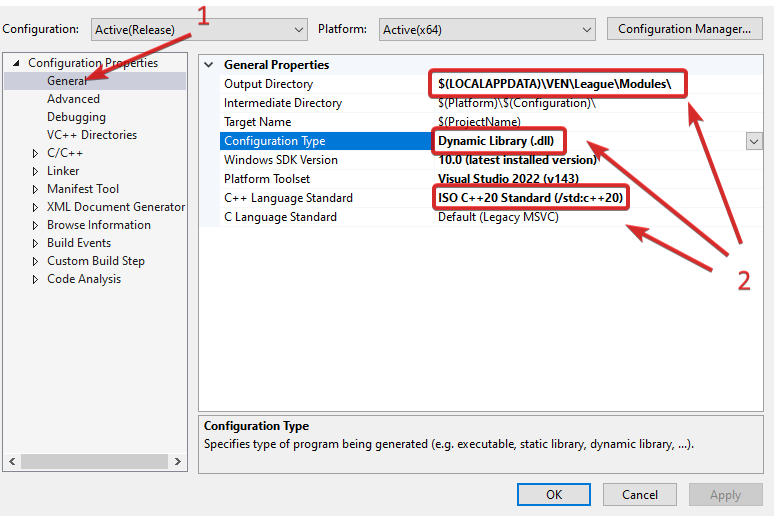
- Select "General" and change the following settings to:
- "Output Directory":
$(LOCALAPPDATA)\VEN\League\Modules\ - "Configuration Type":
Dynamic Library (.dll) - "C++ Language Standard":
ISO C++20 Standard (/std:c++20)
- "Output Directory":
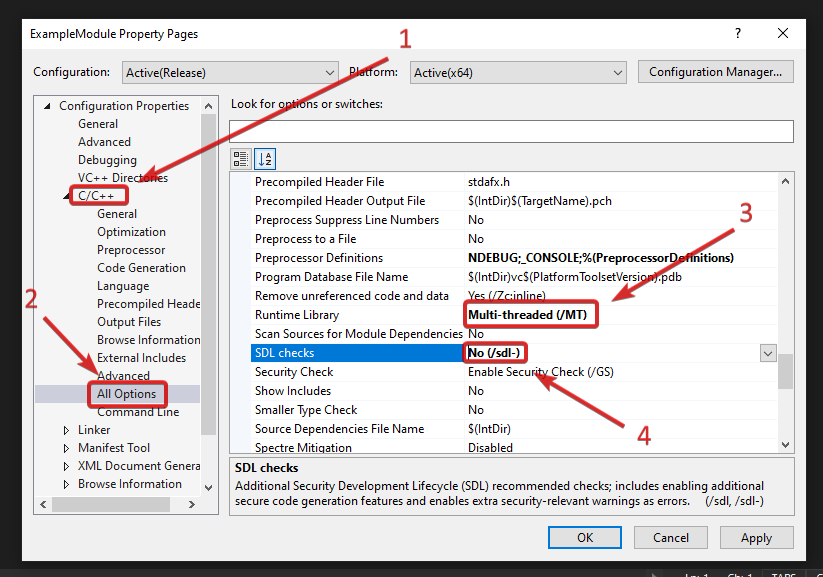
- Select "C/C++ -> All Options" and change the following settings to:
- "Runtime Library":
Multi-threaded (/MT) - "SDL checks":
No (/sdl-)
- "Runtime Library":
Copy the "sdk" directory from the downloaded VEN SDK archive to the project root directory
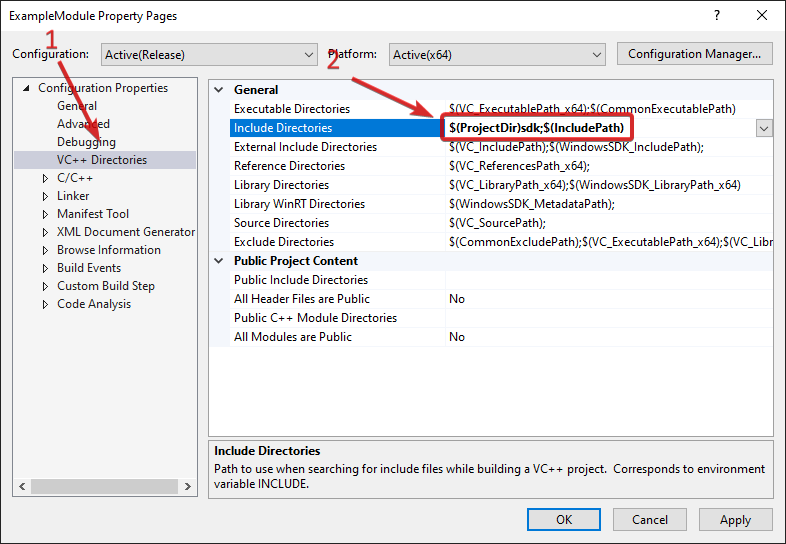
Select "VC++ Directories" and change "Include Directories" to
$(ProjectDir)sdk;$(IncludePath)
Module Properties
Export properties that core can read and load the module properly
cpp
extern "C" __declspec( dllexport ) int SDKVersion = SDK_VERSION;extern "C" __declspec( dllexport ) int SDKVersion = SDK_VERSION;Load Callback
Register "PluginLoad" callback that triggers whenever core loads the module
cpp
extern "C" __declspec( dllexport ) bool PluginLoad( core_sdk* sdk, void** custom_sdk )
{
    g_sdk = sdk;

    g_sdk->log_console( "[+] ExampleModule loaded!" );

    return true;
}
extern "C" __declspec( dllexport ) bool PluginLoad( core_sdk* sdk, void** custom_sdk )
{
g_sdk = sdk;
g_sdk->log_console( "[+] ExampleModule loaded!" );
return true;
}Unload Callback
Register "PluginUnload" callback that triggers whenever core unloads the module
cpp
extern "C" __declspec( dllexport ) void PluginUnload()
{
g_sdk->log_console( "[-] ExampleModule unloaded!" );
}extern "C" __declspec( dllexport ) void PluginUnload()
{
g_sdk->log_console( "[-] ExampleModule unloaded!" );
}Example main.cpp
Example file declaring module load & unload callbacks
cpp
#include <Windows.h>
#include "sdk.hpp"
extern "C" __declspec( dllexport ) int SDKVersion = SDK_VERSION;
extern "C" __declspec( dllexport ) bool PluginLoad( core_sdk* sdk, void** custom_sdk )
{
    g_sdk = sdk;

    g_sdk->log_console( "[+] ExampleModule loaded!" );

    return true;
}
extern "C" __declspec( dllexport ) void PluginUnload()
{
    g_sdk->log_console( "[-] ExampleModule unloaded!" );
}#include <Windows.h>
#include "sdk.hpp"
extern "C" __declspec( dllexport ) int SDKVersion = SDK_VERSION;
extern "C" __declspec( dllexport ) bool PluginLoad( core_sdk* sdk, void** custom_sdk )
{
g_sdk = sdk;
g_sdk->log_console( "[+] ExampleModule loaded!" );
return true;
}
extern "C" __declspec( dllexport ) void PluginUnload()
{
    g_sdk->log_console( "[-] ExampleModule unloaded!" );
}Additional Information for External Orbwalker, Prediction and Evade Coding
Any of those modules must add one of the following lines inside the main.cpp - depending on the module type - so the core can process them accordingly:
cpp
extern "C" __declspec( dllexport ) module_type Type = module_type::orb;
extern "C" __declspec( dllexport ) module_type Type = module_type::pred;
extern "C" __declspec( dllexport ) module_type Type = module_type::evade;
extern "C" __declspec( dllexport ) module_type Type = module_type::orb;
extern "C" __declspec( dllexport ) module_type Type = module_type::pred;
extern "C" __declspec( dllexport ) module_type Type = module_type::evade;You will be able to select them in the Modules menu to replace Orbwalker, Prediction or Evade depending on the chosen type
Summary
Now that we setup the module project, we can go in game and run it.
On next page, we will dive deeper into the SDK with functionalities such as registering and unregistering from events.